I remembered that I needed to cut the binding strips for Amanda's quilt....you know, the one that has been folded and sitting in my bedroom, completely quilted and finished, waiting on the binding and label before I can give it to her to use?

The quilt is 80" x 100" which means I need 360" of binding (plus extra for corners, etc.). I've noticed that every book, pattern and instructor will tell you something different about how wide to make your binding....most common widths are 2 1/4" and 2 1/2"....I've even heard of 3" bindings. Of course, I have to be different. :) I'm cutting my binding strips 2" wide. Why? Because I am planning to attach the binding using my handy-dandy bi-level pressure foot, specifically designed to attach binding and make it look like you did it by hand. :) :)
Most quilters would "eye-ball" and sew the diagonal seam when sewing the strips together....but I'm not most quilters. I am too much of a perfectionist for my own good (and it's not great for time management either). Oh well, I will painstakingly use a pencil to draw my sewing line from one corner to the next. I've found, for me, there is much less ripping out needed when I do this. :) :)
Oh goody....approximately 420" of binding are now sewn together and in one long continuous strip!

Now, all I need to do is iron the seams and also fold the 2" strip in half and iron....leaving me with a nice 1" double fold binding strip to attach to the quilt. I think I'll set this aside and do the tedious ironing later.
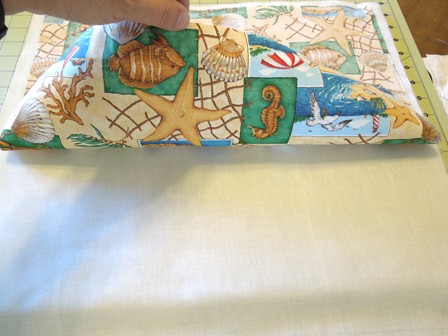
Before calling it a day, I think I'll start to work on a set of 4 placements for Amanda. She is planning a "beach themed/nautical" decor. She wants her kitchen and dining area to be more of a fun, colorful beach look and then have a more mature nautical look in her living room.
I spotted this cute fabric in the clearance bin one day and there was only a yard left on the bolt....perfect for placemats. :)

There was another fabric (again, only one yard left) next to it and I purchased both fabrics with the intention of making reversible placemats...a different look for whatever mood she was in....

I think my intentions were better than the quality of the second fabric (above). I should have paid more attention to the "feel" of the fabric before purchasing them. The first fabric was a nice quality but once I started working with the second fabric, I realized how cheesy and cheap it felt. I went ahead and cut out the pieces for the placemats, but when I attempted to iron the cheesy blue piece, it shrunk and the shape became distorted. I've NEVER had that happen to me before....to have a fabric shrink and distort simply by ironing it? Well....I'm glad it happened before I used it for the placemats. Needless to say, I put it aside (this may actually be the first time in my life that I may throw away the equivalent of 1 yard of fabric).
I ran to my fabric stash and pulled out some white muslin to back the placements....the idea of reversible placemats is out the window this time. :(
I cut the focal fabric (tan beach) into four pieces measuring 14 1/2" x 18" rectangles. (Once sewn, using 1/4" seams, will result in finished placemats approximately 14" x 17 1/2".
I'm taking the easy route with this project......I want to sew them together (along with the batting) like you would a pillow and turn them inside out, so no binding is needed...so I stack them in this order:
Bottom: Batting
Middle: Backing (white muslin) - right side UP
Top: Focal Fabric (tan beach) - right side DOWN
You may notice that I cut the backing fabric and the batting just a tad larger than the placemat fabric and will trim it accordingly once all three layers are sewn together.

Top fabric and middle fabric, right sides together.....
Then batting on the bottom.....

Now all four placemats are assembled, pinned together and ready to be sewn together.......don't forget to leave an opening on one end that is large enough to get your hand through so you can turn the placemats inside out and use your finger to push out the corners nice and neat... :) :) :)

Placemats are sewn together...now it's time to trim the batting and muslin (backing fabric) to match the top fabric.....

All that's needed now is to turn the placemats "inside out", sew along all four sides to close up the opening needed to turn them and make the entire placemat neat and tidy....and do any quilting you desire to finish the project.
Sounds like a job for tomorrow.....it's bedtime now.
No comments:
Post a Comment