Sorry for the delay in posting new blog entries. I'm still not sure what went wrong, but I have been unable to write new posts and add photos for the past 4 or 5 days. :(
There are tons of adorable fabric pillow panels to choose from and when I found this set, I knew Amanda would love them in her living room.
Pillow panels are nice and quick...you can make them as simple or as complicated as you desire. Personally, I don't really care to just simply sew them together and call it a day. I'd rather put a little time into the project and make them extra nice by quilting the tops.
The first thing I do is sandwich the pretty pillow top together with batting and a piece of muslin. For these pillows, I decided to lengthen my machine's straight stitch and "quilt" around the key items in the pictures...such as the boat sails, light houses, American Flag, etc. I also decided to quilt around the outline of the printed "borders".
I decided I wanted to use pillow forms rather than simply stuffing them with poly-fil. By making an "envelope" style pillow slip cover, and inserting a pillow form, this will make it easy for me to make additional pillow slipcovers in different colors, for different seasons, etc., and Amanda will be able to simply change out her pillow slip covers as the mood strikes her. :) This will also reduce the amount of storage space required compared to having a dozen pillows to store when not in use.
The size of these pillow panels made the construction of the pillow back easy to calculate. For each pillow, I started with a piece of fabric that was 18" x 22". You could use a "fat quarter" for each pillow back....but since I was making a set of two pillows, I took a 1/2 yard cut of fabric (18" x 44")....opened it up and cut it in the middle which gave me two pieces of fabric 18" x 22" each.
The next step was to hem both of the short edges (18" side) of each 18" x 22" rectangle. I used my hemming pressure foot to do the job quickly.....
Then, I placed my "hemmed on both ends" piece of fabric on my cutting board and used my rotary cutter to once again cut it in half....giving me two 18" x 11" pieces of fabric.
I am now ready to put everything together and sew the final seams....
First, I place the quilted pillow top....right side up....
and the final layer is the two pieces of hemmed backing fabric....with the raw edges on the outside and the hemmed edges overlapping each other in the center back of the pillow.....
As you can see above, I pin the layers together on all four sides to hold everything in place as I sew all around the four edges. (The overlapping of the hemmed edges creates the opening to put the pillow form inside.)
After I sew all around the entire pillow square (all four sides)....then I just turn the pillow slip cover inside out....make sure you poke out the corners good to form a nice square shape.
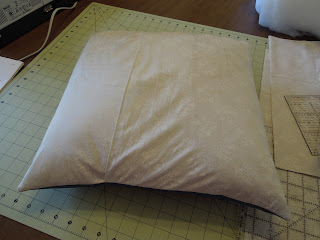
Here's my pillow form....
Gently stuff the pillow form through the back opening.....
Flip the completed pillow over and admire your handiwork..... :)
Until next time.....happy sewing! :)


No comments:
Post a Comment