Thursday, August 23, 2012

Pretty but Easy Gift Idea

Dear Blog Readers, I have a challenge for you! :)  I mentioned in a past blog entry that I was asked to consider teaching a quilt class at our local fabric shop.  The shop owner specifically said they needed "small project" classes to offer the public.

This is a project I thought may be appropriate....thus the challenge to you!  Would you like to help me evaluate my teaching skills?  LOL  I figure that if YOU are able to make them using my written instructions and photos...then surely to goodness I can teach it face to face with others. :):)

If you are willing to take on this challenge....send photos of your finished product so I can brag on you and share with everyone who follows this blog:

Email:  grandmaspromise@yahoo.com

PIECE OF CAKE PIECED PLACEMENTS (set of 4)

1)  You will need FOUR different fat quarters.....or FOUR different pieces of fabric that measure 18" x 22" each.  

It's best to choose two (2) darker, one (1) medium and one (1) lighter color fabric that compliments each other.  When choosing your fabrics, you can go with a holiday theme (Christmas, Patriotic, Fall, Valentines, etc., etc.) or choose a focal fabric that would be considered a novelty print (cows, roosters, teacups, etc., etc.)...or just pick colors that you like and match your decor. :)

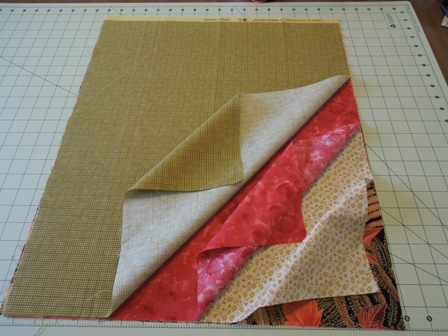
I decided to make a set of seasonal placemats since Fall is just around the corner....here are my choices:


I'm considering the darker, fall colors, large leaf print as my focal print, with the mottled reddish/orange "solid" as my second darker fabric choice.  The small scale olive check  is my medium color choice and the cream with a small olive vine/leaf design is my light color choice.

2)  Press/iron your fabric pieces to remove all wrinkles.

3)  Stack them (right side up) on your cutting mat in the following order....dark (my leaf design), light (my cream), dark (my red mottled) and medium on top (my olive check).


4)  Using a basic 24" long acrylic ruler and your rotary cutter....square up all four sides...


I'm sure we all have "our own way" of squaring fabric up and making sure all sides are even. Use whatever method you prefer. :)

Each person will have a slightly different measurement for their squared up pieces...depending on how much of a sliver of fabric you had to trim from each side to even up all four edges.  My red fat quarter was slightly smaller than all the others, so I had to trim accordingly.

You should end up with a nice stack that is approximately 17 1/2" x 21 1/2"....


5)  We will be making our first cuts up the long (approx. 21 1/2" ) side of our stack.  

Using your long acrylic ruler, measure in 3" to make your first cut.  Since we are cutting through four layers of fabric, make sure your blade is nice and sharp!


We will call this first 3" wide strip as our "A" strip.....


As a safety precaution to make sure I have successfully cut through all four layers of fabric....I always gently lift the stack of uncut fabric away from the cutting line.  If there is a section that I missed, I gently lay it back down and correct my error.  I NEVER move my ruler until I am certain I have a clean cut!!!!!  (P.S.  I often times will place something small and heavy....like my hubby's tape measure above....on my ruler just to help hold it in place while I'm cutting and then making sure the cut included all my fabrics. :)

6)  For our second cut....measure in 2"....


We will refer to this 2" strip as "B" strip...

7)  For our third cut....measure in 2"....


We will refer to this 2" strip as "C" strip.....

8)  For our fourth cut....measure in 4"....


We will refer to this 4" strip as "D" strip ....

The final strip of fabric that is now left will be approximately 5 1/2" to 6" wide...it will be referred to as      "E" strip.

Turn your cutting mat so your strips are now horizontal.  By turning the cutting mat, you can see easily how the placemats should look at this point in the construction...


Now the fun part starts........

9)  Working with "B" strip (second strip from the top)...move the top layer/fabric strip to the bottom of the stack.....


10)  Working with "C" strip (third strip from the top)....move the top TWO layers/fabric strips to the bottom of the stack.....


11)  Working with "D" strip (fourth strip from the top)...move the BOTTOM layer/fabric strip to the TOP of the stack.....


Do NOT move any layers in you're top (A) and bottom (D) sections. :)

Your stack of fabric strips should now look like this.....


To keep from getting confused...it is best to completely construct each placemat top before starting the next one.....sew each strip, right sides together, using a 1/4" seam....

You should end up with something like this.....


Without touching your remaining stacked strips of fabric, the second layer of strips should look like this....sew the strips together....


The third layer of strips should look like this....sew the strips together....


The final layer of strips should look like this....sew the strips together....


12)  Now it's time to take all four of the sewn placemats to the the ironing board and press the seams OPEN.  I know that in the quilting world, we're usually told to press all seams to one side or the other...but in this case, to reduce the bulk of fabric we will be sewing together in the next steps...it makes it easier to simply press all the seams open this time. :) :)

13)  After you have finished ironing all the seams open...bring everything back to your cutting mat and lay each placemat on top of the other...right side up.  


Make sure you get everything straight...with all the seams matched up....you may even want to use a few straight pins to pin the layers together near each seam so they don't slide when making the next cuts.

If you find that the placemats are not quite the same size, you should square them all up at this time just like you did in the beginning.  Thankfully, all four of my mats ended up being the same size so I am able to continue to the next step without any trouble.

At this point, I turned my entire cutting mat around so that the mats now look like this.....

Trust me...because of the cuts we need to now make....turning the cutting mat around (which means our placemats are now upside down)....makes life so much easier as we continue.... :) :)


14)  Using your long acrylic ruler once again, measure in from the left edge of the stack 3" and cut through all four layers....


15)  Now measure in another 2" inches and cut through all layers....


16)  Now measure in another 2" inches and cut through all layers....


This is what your stack of fabric should look like at this point.....


You probably think I'm crazy by now....but just trust me.....turn your cutting mat around one last time so that when you look down at your project it now looks like this....


Remove the pins and let's have some more fun rearranging our strips of fabric.....

Looking at your strip stacks now....(from left to right)....DON'T touch the first very wide strip of fabric on the left.

17)  Move to the second strip of fabric which is 2" wide....move the top two layers of fabric to the bottom of the stack...


18)  Now look at the third strip of fabrics which is also 2" wide....move the BOTTOM layer of fabric to the TOP of the stack....


DON'T touch the last strip of fabric on the right. :) :)

Your project should look like this.....


Do you see the pattern that has emerged before your eyes?  :) :)

19)  Sew the strips together using a 1/4" seam....I found it easier to sew the widest strip (on left) to the strip on it's right together first....etc., etc.

The second layer should look like this....sew the strips together....


The third layer should look like this....sew the strips together.....


The final layer should look like this....sew the strips together.....


20)  Now all four placemat tops are complete....take them to the ironing board and this time you can press all the seams to one side. :)

Now you should have a coordinated, adorable set of four placemats tops....


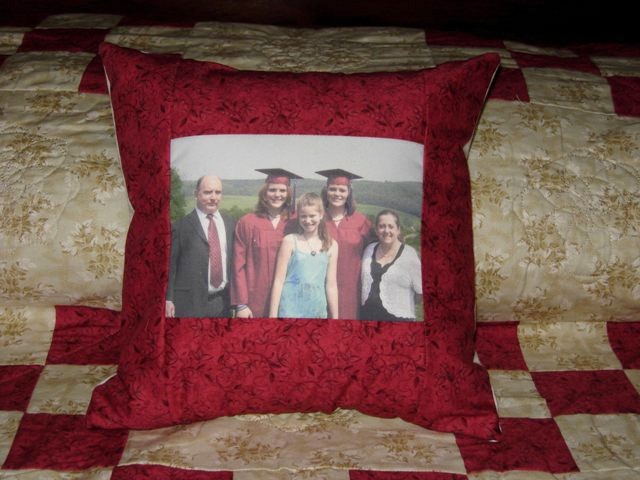
All that's left to do is finish and quilt as you wish.  I plan to use the "pillowcase" method.  Don't you think these would make lovely gifts?

This idea was taken from a pattern called "TakeFour"...for Something Sew Fine Quilt Design.  

If you enjoyed making this project, you may be interested in purchasing the pattern because it shows you how to come up with a total of 5 different placemat designs simply in the way you cut and flip the strips of fabric used.

As I mentioned earlier...I would truly appreciate hearing from anyone who decides to make this project themselves.  Let me know what you think.  Were the instructions clear?  Did the photos help?  Do you think there is any hope of me being able to teach others how to do this face to face? :)

By the way....I was able to complete these tops (choosing my fabric fat quarters, cutting, sewing and ironing) in one evening.  

Happy quilting! 

Wednesday, August 22, 2012

Pillows using Panels


Sorry for the delay in posting new blog entries.  I'm still not sure what went wrong, but I have been unable to write new posts and add photos for the past 4 or 5 days. :(

There are tons of adorable fabric pillow panels to choose from and when I found this set, I knew Amanda would love them in her living room.

Pillow panels are nice and quick...you can make them as simple or as complicated as you desire.  Personally, I don't really care to just simply sew them together and call it a day.  I'd rather put a little time into the project  and make them extra nice by quilting the tops.

The first thing I do is sandwich the pretty pillow top together with batting and a piece of muslin.  For these pillows, I decided to lengthen my machine's straight stitch and "quilt" around the key items in the pictures...such as the boat sails, light houses, American Flag, etc.  I also decided to quilt around the outline of the printed "borders".


I decided I wanted to use pillow forms rather than simply stuffing them with poly-fil.  By making an "envelope" style pillow slip cover, and inserting a pillow form, this will make it easy for me to make additional pillow slipcovers in different colors, for different seasons, etc., and Amanda will be able to simply change out her pillow slip covers as the mood strikes her. :)  This will also reduce the amount of storage space required compared to having a dozen pillows to store when not in use.

The size of these pillow panels made the construction of the pillow back easy to calculate.  For each pillow, I started with a piece of fabric that was 18" x 22".  You could use a "fat quarter" for each pillow back....but since I was making a set of two pillows, I took a 1/2 yard cut of fabric (18" x 44")....opened it up and cut it in the middle which gave me two pieces of fabric 18" x 22" each.


The next step was to hem both of the short edges (18" side) of each 18" x 22" rectangle.  I used my hemming pressure foot to do the job quickly.....


Then, I placed my "hemmed on both ends" piece of fabric on my cutting board and used my rotary cutter to once again cut it in half....giving me two 18" x 11" pieces of fabric.


I am now ready to put everything together and sew the final seams....

First, I place the quilted pillow top....right side up....


and the final layer is the two pieces of hemmed backing fabric....with the raw edges on the outside and the hemmed edges overlapping each other in the center back of the pillow.....


As you can see above, I pin the layers together on all four sides to hold everything in place as I sew all around the four edges.  (The overlapping of the hemmed edges creates the opening to put the pillow form inside.)

After I sew all around the entire pillow square (all four sides)....then I just turn the pillow slip cover inside out....make sure you poke out the corners good to form a nice square shape.


Here's my pillow form....


Gently stuff the pillow form through the back opening.....


Flip the completed pillow over and admire your handiwork..... :)


Until next time.....happy sewing! :)

Friday, August 17, 2012

HOORAAY! Amanda's Quilt is FINISHED!!

I was tired of looking over and seeing that mountain of binding that's been laying around for days now.  I dreaded the process of "getting started" but I knew it must be done, plus from past experience I know that if I will ever just START, then it isn't as bad as I've been contemplating it will be. :)


I know this technique is backwards from what we are always taught, but when using the bi-level top-stitch pressure foot....instructions say to sew the binding on the back of the quilt first.

By the way, I was ready to do the "happy dance" when for the first time that I can remember, I was actually able to attach both ends of the binding together (when they meet back up after sewing all around the quilt), on the diagonal PERFECTLY the FIRST TIME!!!!  No ripping out and doing over needed this time! LOLOL

Then the fun part....folding the binding over and sewing it to the front.  This step went better than past experiences also.  Normally I sit and pin (or clamp) the binding in place and then sew it down.  This time I just used my fingers to hold it in place a little at a time as I slowly went around the entire 360 inches of the quilt edge.  I may have sewed slower, but the actual application went smoothly and again....no ripping out seams required! :)


The entire process was practically flawless.  Using this pressure foot, and a reversed applique stitch, the sewing machine was able to imitate a hand-sewn look to the binding.  For someone like me...someone who really dislikes handwork....you just can't get any better than this!!! LOLOL

Before letting Amanda know it was finished, I had to go spread it out on my own bed once and just savor the feeling of accomplishment for a few minutes.


And of course, I had to turn it over and get a good look at the back also......


I'm happy!

Amanda's happy too!!!!  She LOVES it!  She feels it has a fun, soft, shabby chic, cottage look about it and she's also thrilled that it is so HUGE. :) :) :)

I was not blogging when I finished Emily's quilt....so I thought I'd post a couple of pictures of her quilt to prove that I have been fair with my twin daughters! LOLOL

While Amanda's quilt is a Giant Pin-Wheel in orange, yellow and mint green.....

Emily's is an Irish Chain in red and creamy/olive green.....


The back....


Oops....I guess I'm not completely finished with Amanda's gift after all. :(  I have one other little project left before it will be equal with Emily.  I just have to find the second copy of the photo that I printed on fabric two years ago and use the scraps from Amanda's quilt to make her a memory pillow for her high school graduation (the reason I made this quilt to begin with).


****For anyone who missed this information earlier....I started both Emily's and Amanda's quilts as high school graduation gifts at the same time, in 2010.  I completed Emily's first because she was leaving for college and I wanted her to take it with her.  I then completed Amanda's quilt top and the very week I had intended to sandwich it together and complete the quilting and binding....I fell and broke my right elbow and tore the rotator cuff in my right shoulder.  It has taken nearly two years for me to regain the strength and flexibility in my right arm to tackle the job of completing Amanda's quilt.  It is LONG OVER-DUE....and bless her heart, she has been so understanding.

That's my story and I'm sticking to it!

After this, I think I may take a day off from sewing....or not! :)

Thursday, August 16, 2012

Marianne's Finished Quilt Top

I know that everyone who has been following this blog is just as excited as I am to see Marianne's finished quilt top.

Although she had purchased a fabric for the borders while we were in Wellsboro, PA for the quilt workshop.....once she had sewn together all of her completed blocks to form the quilt center, she realized that she wasn't as happy with her previously chosen border fabric as she thought she would be.....which meant.....another trip to a fabric shop!!!!!

This photo shows her placing a few of her blocks next to her new choice....a blue star print by Moda Fabrics.


Here's the center of her quilt with all blocks sewn together.....


The next picture shows the quilt top BEFORE the blue border has been sewn on.....


Now look at it with the border attached.....you will notice that there is a blue narrow border, than an additional border consisting of hourglass blocks, then the last narrow blue border.


A close-up of the top of the bed....


In case you are wondering....this is a Queen size bed quilt!!!

Now all that is left to do is actually quilt it.  Marianne is using the same blue border fabric to back her quilt.  She is now deciding whether she wants to attempt to quilt it herself or take it to a longarm quilter.  :)

I'm still working on my own version of this quilt top! LOL  Marianne is FAST!!!!!!  I'm no where near completion or unveiling time. :)  Of course, if and when I get there, I will certainly share it with all of you. 

Congratulations Marianne....it's BEAUTIFUL....and you have successfully put me to shame and stirred up a tad bit of envy and jealousy!!! LOLOLOLOL

UUUmmmmm....you know, Christmas is just around the corner....and I happen to have a queen size bed also!!  (hint....hint....hint....hint)  :)  :)  :)  :)  :)